Octopressを使って無料ブログを作成しましたので、その手順を説明します。 エディタとgitで管理できるので、便利かなーと思い、導入してみました。 この記事がOctopressで書く初めての記事になります。
目次
1. Githubでリポジトリ作成
2. Octopressのインストール
3. Octopressの初期設定
4. 記事を投稿する
5. 記事の中に画像を使う
6. デプロイする
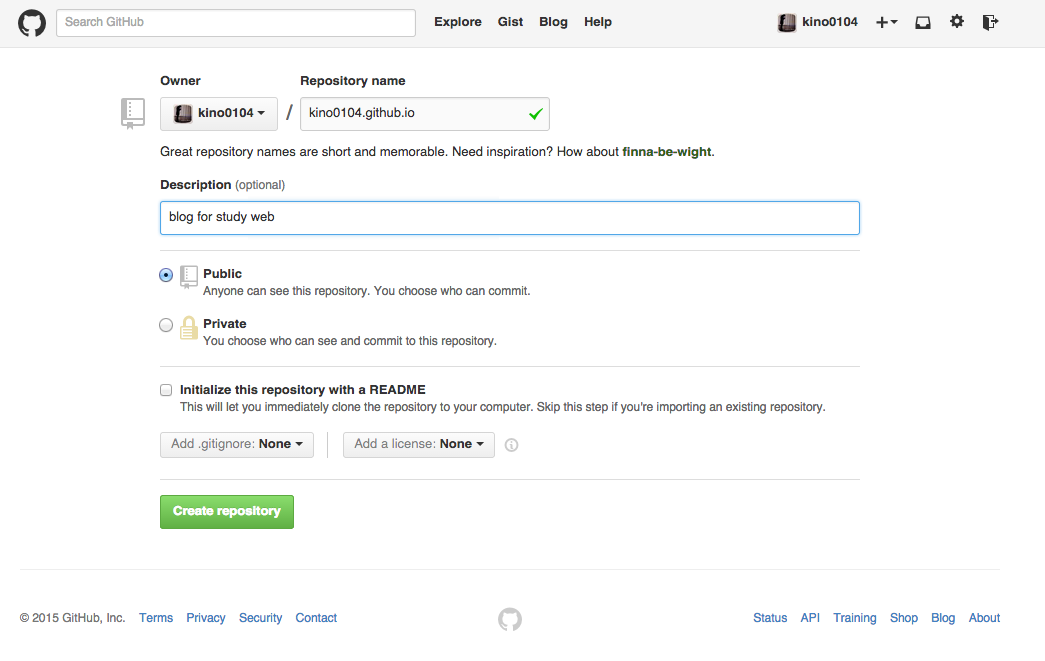
1. Githubでリポジトリ作成
最初にGithubへログインして、リポジトリを作成します。
リポジトリ名はusername.github.ioとします。
usernameはGithubのユーザ名を入れます。
2. Octopressのインストール
次に、作業ディレクトリに移動して、OctopressをGithubからクローンします。 usernameはGithubのユーザ名を入れます。
1 2 | |
bundlerをインストールします。
1
| |
必要なgemをインストールします。
1
| |
3. Octopressの初期設定
GitHub Pageに表示するために、下記コマンドを入力します。 usernameはGithubのユーザ名を入れます。
1 2 3 4 5 | |
次に、_config.ymlを編集します。 この中には、ブログのタイトルやサブタイトル、著者情報などを記述します。
1 2 3 4 5 6 7 8 9 10 11 | |
4. 記事を投稿する
ここまで完了したら、さっそくブログ記事を作成してみます。 まずは記事のテンプレートを作成するために、下記コマンドを実行します。
1 2 | |
Enter a title for your postで入力するタイトルはパーマリンクになるので、英語で記述する必要があります。
source/_posts/2015-03-26-title.markdownというようなテンプレートが生成されますので、エディタで開いて編集します。
1 2 3 4 5 6 7 8 9 | |
記事のタイトルやカテゴリーを入力します。ここでのタイトルは日本語で問題ありません。
記事を書いたら、以下のコマンドでプレビュー表示して確認してみます。
1
| |
実行後に、http://localhost:4000にアクセスすると、
プレビューを確認できます。
5. 記事の中に画像を使う
記事を書いていると、画像を使いたい場合があります。
Octopressでは、画像はsource/imagesに保存します。
ただ、imagesディレクトリに直接画像ファイルを置くと、わけがわからなくなるので、例えば、記事のタイトルと同じディレクトリを用意して、その中に画像ファイルを格納します。
今回で言うと、/images/2015-03-26-octopress-install/です。
octopress1.pngをここに保存しておきます。
Markdown記法では、画像は下記のように指定します。

公式(Image Tag)では、 下記の書き方が紹介されています。
<img class="[class names]" src="/path/to/image" title="[width] [height] [title text [alt text]]" >
また、画像の指定は、相対指定と絶対指定があります。 この記事で一番はじめに登場する画像は下記の相対指定で書いています!
相対指定:/images/2015-03-26-octopress-install/octopress1.png
絶対指定:http://kino0104.github.io/images/2015-03-26-octopress-install/octopress1.png
6. デプロイする
最後にデプロイして、記事投稿完了です。 途中、Githubのユーザ名とパスワードを入力する必要があります。
1 2 3 4 5 | |
簡単ではありますが、Octopressでのブログ作成手順でした。 不明点や間違いがありましたら、コメントいただければと思います。